go back to JFF

16 November 2009

Celebrating Julia Woodman

On November 12, 2009 many local Atlanta jewelry artists & students met at 7pm at the High Museum of Art in Atlanta for a very special occasion. To celebrate Julia Woodman and the High Museum's recent acquisition of her Woven Majesty silver tea service. Many of Julia's fans, friends, students and colleagues met for this evening special evening planned by the Georgia Goldsmith Group.

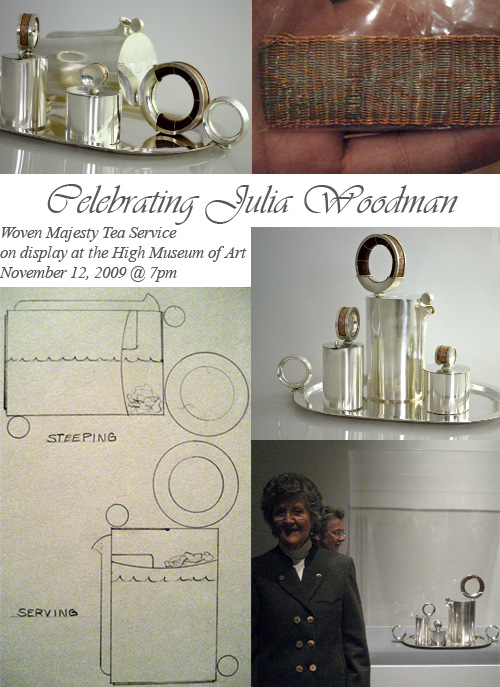
The photos above clockwise from top left: The Woven Majesty Tea Service in steeping position; an upclose photo of the weaving pattern on the handles on the vessels; The Woven Majesty Tea Service in serving position; Julia and her Tea Service Exhibit; Julia's drawing explaining the inner workings of the tea pot.

Julia shared with us many stories of making the Woven Majesty tea service. The teapot was the original piece, created in 1991, with the completion of the service commissioned by the High Museum in 2008. The service was completed and put on display September 2009.

There are many aspects of this teapot and service that brought up questions from the group and further discussion, including the woven handles of the service and the steeping mechanism on the inside of the pot.

The handles and vessels are adorned with card weaving of copper and fine silver (show above). "It is an ancient Viking technique found on their burial ships. The Vikings used wool not metal - I just thought it would be fun in metal. The wood is paduk, the same color as copper." Julia Wooman

The teapot has two feet on bottom region on the side of the handle for the pot to rest while steeping. A strainer is installed inside the upper portion of the teapot making it possible to separate the tea leaves from the hot steeped tea when raised upright in the serving position.

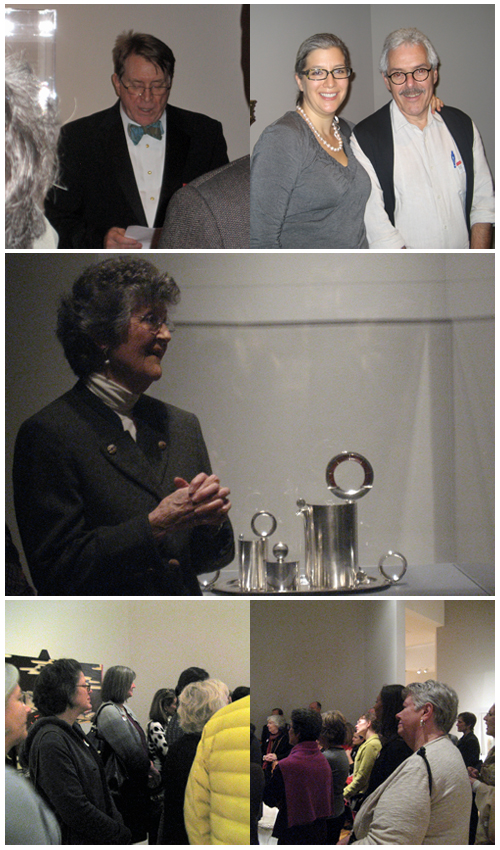
The photos above from top left clockwise: Georgia Goldsmith Group's President Alan Bremer introducing Julia Wooman; Maggie Glezer & her husband (Maggie set up the whole talk and celebration, Thank you!); Julia speaking about her process; Julia's students, friends, and family.

Lastly I want to share with you all an interview I did with Julia last year. Julia was selected as our Jeweler of the Month for JFF Jeweler Supply's October 2008 Newsletter. Go here to read the article.

02 November 2009

Tool of the Month

Tool of the Month :
Bench Block

A steel bench block, I must say is not the most exciting tool on the surface. No pun intended. The bench block is smooth, flat, usually square hunk of steel commonly used to hammer on. However, this little block can be a SUPER time saver. But before I share some of my time-saving secrets, let me tell you a little about steel blocks in general.

The traditional bench block or bench anvil, should have at least one polished surface and one crisp edge. It is useful to have one rounded edge, for projects not requiring a sharp angle. Basic tasks include flattening wire, bending, riveting, and general hammering. In proper use, the hammer never strikes the block directly, which would make a dent. If a blemish occurs, the block should be sanded a polished to its original state. (Which I must say is not a lot of fun!)

The steel quality of your bench block is very important. Tool steel is well-suited to be made into tools, as it has a distinctive hardness, resistance to abrasion, and its ability to hold a cutting edge. While tool steel is susceptible to rust, the hardness can't be beat! Stainless steel is a good alternative as it does not stain, corrode or rust as easily as ordinary steel (it stains less, but is not stain-proof). However, stainless steel is a softer steel alloy than tool steel and your standard silversmithing hammers. Meaning if the hammer slips and hits the bench block, you have a larger, more significant dent to remove in your bench block! To inhibit rust, store your bench block covered with a cloth soaked in a little oil.

JFF carries two styles of bench blocks.

The Utility Anvil is made of stainless steel on one side and has a nylon block on the opposite side. The steel side has a mirror finish. It has a rubber base to "soften" the hammer blow sound. These bench blocks are round and come in two different sizes:
  • 2" diameter is $22.80
  • 3 1/2" diameter is $34.45
The Steel Bench Blocks are made of case-hardened tool steel. They are ground flat with all edges being sharp. These blocks are square and come in four sizes:
  • 2 1/2" x 2 1/2" block is $12.95
  • 4" x 4" block is $20.00
  • 6" x 4" block is $27.00
  • 6" x 6" block is $32.80
I know you have been waiting to hear my secret uses:
  • Have you ever been trying to sand something flat and you just cant get it perfect? Place the sand paper on top of the bench block, grit surface facing up, and sand away.
  • The flat surface is a great place to layout your work.
  • Many times I have a couple projects going on at the same time on my bench. To keep organized I section off my bench block to keep the components separated but easily accessible.
  • Are you trying to see if the edge you are filing is flat? Place the edge perpendicular to the block and look for any light between the metal and the block. If you see light, time to break back out the file!
  • While I'm setting stones, I keep a small bench block with my stones on it. If I'm bezel setting, I have a flat surface to wrap my bezel around the stone. If I'm setting faceted stones, I keep them table side down and I can easily measure & remeasure my stones. As an extra bonus the raised surface keeps me from accidentally knocking the stones into my sweeps drawer.
  • Do you have another useful tip for using your bench block? Please leave comments to share your bench block tips and tricks!

If you would like to receive more information like this please sign up for the JFF Monthly Email Newsletter!