go back to JFF

29 January 2010

Archives February 2009 : Question & Answer

Q :
When I solder copper with silver solder, the seam is silver. Is there a copper solder I can use or something to fix this?
A :
Yes, there is such a thing as copper solder that plumbers use. You can purchase it at some hardware stores and online. It is called copper phosphate. Upon research, I found many people had a hard time using the solder and getting it to flow. Best results were found using an oxy-acetylene torch. Color matching was also a problem, so seems are still visible.

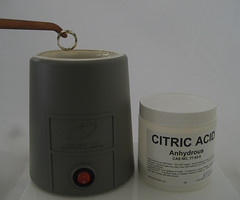
There is another, easier option: Create a copper plating solution out of your pickle.

The first step is to solder your copper with silver solder. Continue to make your piece, hammering, filing, sanding, polishing, etc until the piece is finished to your liking, except for the silver solder seam(s).

To make your seam copper color, you will use your pickle solution to copper plate the piece. Simply place a nail or any other object that is steel or iron in your pickle. And you’re done!

So how does this work exactly? When you use your pickle, normally, it is taking off the black oxidation (copper) off the surface of the soldered piece. Tiny copper ions are then in the pickle solution. When steel or iron is introduced, it creates a reaction making the copper ions swimming in your pickle want to attach to anything in the pickle. Thus, copper plating whatever is in the pickle. The copper ions are so small that any filing, polishing or any other surface treatment will come off once the piece is plated. But because they are so small they imitate the surface that they are plated onto.

If you do this, be sure not to use any iron or steel that has rust on it, it will forever contaminate that batch of pickle. That being said, if the iron or steel is clean, your pickle is reusable, so make sure to take the nail or other object out of your pickle before you use it again. Also, the more you have used your pickle the better this process will work. A new pickle solution will not have any copper ions in the solution to plate the piece.

28 January 2010

Archives February 2009 : New Item

JFF New Item :
Master Coiling, Bale Making, & Wrap-n-Tap Pliers

The wire coiling, bail making, and wrap’n’tap pliers are a category of pliers that are characterized by having cylindrical jaws. Originally designed for wire wrappers, these pliers are endlessly useful for making rings, bails, jump rings, ear wires, and other projects. This month I am re-introducing the Master Coiling plier, along with introducing some newer varieties.

The Master Coiling Pliers were developed to make loops and coils without nicking and marring your wire, which can cause many headaches and A LOT of clean up. These pliers have one flat jaw, allowing you to hold the wire, while rotating the round jaw to form the perfect loop. The round jaw has three steps for consistent sized loops and coils, measuring 2 mm, 3.3 mm and 5 mm in diameter. The jaws are highly polished stainless steel. The Master Coiling Pliers are $11.95*.

The Bail Making Pliers offer two cylindrical jaws that measure 4.8 mm (3/16”) and 7.9 mm (5/16”) in diameter. They are perfect for making bails, creating consistent sized coils, and bending sheets. The jaws are polished stainless steel and are $12.95*.

The Wrap’n’Tap Pliers are much like the Master Coiling Pliers, but have a plastic protected jaw to prevent marking patterned wire, sheet, and other stock. With these pliers you can shape rings or make consistent loops in many sizes and half-round wire will not twist, scratch or deform. The Wrap’n’Tap Pliers are made of stainless steel and are available in two sizes. The smaller plier has a barrel diameter of 5 mm (3/16”), 7 mm (9/32”) and, 10mm (3/8”). The larger has a barrel diameter of 13 mm (1/2”), 16 mm (5/8”) and 20 mm (3/4”). These pliers are $28.95*.


*prices may change without notice

27 January 2010

Archives February 2009 : Jeweler of the Month

Jeweler of the Month :
Anne Choi

Bio
I was born in Boston and my family lived in New York, Missouri, and and Japan before we moved to Atlanta in 1972. I grew up around art and handcrafts. My mother did block printing, stained glass weaving and rug making, before settling into a career as a potter; one of my aunts was a painter, and another a weaver. During the four years that we lived in Japan, my family traveled all over the islands, visiting potters kilns, weavers and dyers studios, and any other craftsman who would open their workshop to the "crazy foreigners." We were met with amazing kindness and generosity; the artists always took the time to demonstrate and discuss their work. I knew as a child that I wanted to be an artist when I grew up—I just didn't know what kind.

I am not formally trained as an artist or a jeweler. I majored in film and Latin in college, spent years in retail sales, owned a toy store, and sold antiques for 13 years before I finally tried jewelry making. I had worked with my mother on and off in her pottery studio over the years, but never really felt that I could make the clay say what I wanted it to. Around 1992, I began taking classes at Chastain Arts Center with Shirley Berse. Shirley encouraged me to experiment with casting, and to develop my own style. (I think she was amused by my odd ideas...) At first I made all kinds of jewelry, but soon settled on bead making as my true calling. I have sold my work at local art shows and fairs, but now I sell only at bead shows, and through my website.

What was your first piece?
A ring - a plain silver band with at bezel set cabochon cat's eye. Anyone who ever studied with Shirley Berse made one like this as a first project.

Who are your jewelry heroes?
John Cogswell, for his dedication to teaching and his determination not to let the art of metalsmithing die out. Bob Burkett, for his explorations in casting and his generosity in sharing his skill.

What is your design inspiration?
I think of my jewelry as an intimate form of communication, a message to one's self that one wears - a talisman, or charm, a link to an inner world. I like to use images and words that have personal significance to me, but are open to multiple interpretations, leaving the wearer free to interpret significance and symbolism for themselves, as they choose. For me, a great part of the beauty and fascination of this work is the chance to examine and compare the different beliefs, myths, traditions, folklore, and superstitions of different peoples, and to incorporate them as a part of my vocabulary.

What is your favorite part of making jewelry?
The excitement of rinsing the investment off a newly cast piece, to see if the design worked the way I had intended it to.

What is on your bench now?
Literally — a huge mess - in addition to my tools, at least a dozen books on varied topics -insects, plants, poetry, quotations, symbolism, and art - piles of paper with sketches and quotations scribbled on them - clay molds, and test carvings - a cicada shell, a dead cicada, and a dead carpenter bee in a baggie.

Figuratively — I used to make silver buttons, and have recently started to design them again. I hope to have them in production by this summer.

What is you most indispensable tool?
My OptiVisor.

26 January 2010

Archives February 2009 : Tool of the Month

Tool of the Month :
Bench Pin

A bench pin begins as a block of wood that is unremarkable, but as each mark, cut, grove, filing, hole, plane and texture appears, it is evidence of processes that have created something remarkable. Individual to each jeweler, these markings make the bench pin more comfortable and useful. Turning the bench pin into a version of your own trophy of the work you have produced.

Ok, so maybe not a “trophy” per se. Maybe it is an old, ugly, worn out piece of wood that just happens to brace your work as you need it, or has the perfect groove worn into it for sawing your tubing, or has the big hole in the back corner where you drill all your holes. Whatever you use your bench pin for, it is probably the most versatile tool on your bench and I’m sure you use yours all the time! But I’d be willing to bet the bench pin is one of the more underutilized tool on your bench as well. I am constantly finding new uses for my bench pin. Typically, when I’m in a bind, if I’m not using my bench pin, it is part of the answer that will get me out of that bind.

From sawing to stone setting, filing to wax carving, there are many different styles of bench pins that are made for your different needs and that can be modified for individual needs.
  • A stone setter’s bench pin has a large half-round scoop or wide “v” cut into which the jeweler can steady a pitch stick or ring clamp that holds a work piece.
  • For most sawing projects a bench pin will have a “v” cut with a circle, v-slot to saw between and brace the metal on both sides of the saw.
  • Using the flat side of the bench pin with no notch cut out works well for filing. Using the end of the bench pin as a guide for straight filing.
  • Creating deep notches, grooves, and indentations in your bench help with gripping small parts, bracing a prong while setting, holding round stock or tubing for controlled sawing and other tasks.
  • Some jewelers cut a well in their bench pin to hold burs, stones, or other small components.
  • The bench pin can also be used for drilling. However, drill holes can become an unwanted catch-all for small stones and pieces of metal.
  • It can also be used as a door stop in a pinch.
Jeweler’s benches typically come with a slot that fits a standard bench pin. The standard bench pin has a tongue on it that can be modified to fit into most benches and basically looks like a wedge of wood. Three widths are available and are fairly inexpensive. The standard bench pins are meant to be modified to the jeweler’s liking.
Small Bench Pin: $2.20*
Medium Bench Pin: $2.50*
Large Bench Pin: $2.90*

Because many of us don’t have a bench when we start out making jewelry, and the idea of cutting a hole in your dining room table is just out of the question, the bench pin with c-clamp is great to start out with. It has a v-slot cut out of the center for sawing, so there is little to no modification necessary. This bench pin is German made and has a groove cut out for the c-clamp to lay flush into the bench pin. Giving you a large flat surface and ultimate support when working. The clamp adjusts for benches up to 1-3/4" thick and the actual bench pin measures 6-3/4"long by 2-1/2"wide.

Diagram a: Unscrew the clamp so the opening is big. Insert the clamp (the squared off end) underneath the bench pin and up through the hole (the side that doesn’t have the cutout).
Diagram b: The squared-off clamp should fit into the top slot cutout in the pin.

Diagram c: The gap between the underside of the pin and the top of the screw part of the clamp attaches to the table. Tighten the clamp screw so it grips on the table and bench pin should be secure.
The bench pin with c-clamp is $6.85*.

The bench pin with anvil is another great option for the beginner jeweler. This is a two-in-one tool, with a bench pin that is secured under a flat bench block with a clamp. The main down side to this bench pin is the width, it is much narrower than most any other bench pin and limits the amount of support. The bench pin with anvil is available in two qualities, economy and European-made. The European-made bench pin with anvil is pictured above, it is $32*. The economy version is $14*.

If you already have a bench or table dedicated to your jewelry making, a good option is a bench pin that mounts directly to the bench or table. The metal holder can easily be mounted onto the front of your bench with two screws. A wing nut locks in the bench pin. While this allows for the jeweler to easily switch bench pins for certain applications, the holder keeps the bench pin steady and supported.
The bench pin in holder is $10.20*.

The Bench Pin for Rings is a specialty bench pin for sizing rings. Made especially for holding rings secure while sawing, the bench pin is approximately 1/2” wide with a groove in the front. A thin channel running the length of the bench pin allows for the saw blade to glide through for cutting the rings. It attaches with a screw to the top of the bench.
The bench pin for rings is $2.65*.

The GRS BenchMate™ is no ordinary bench pin, with its various components that easily switch in and out. The BenchMate™ begins as a bench pin and quickly turns into a soldering station, then a bench pin holder for stone setting, then can be switched to house an engraving block or pitch bowl. While I could spend hours talking about the BenchMate™ and all of it’s attachments, for the sake of this article, I will stick to the bench pin for this month.

The whole of the BenchMate™ system begins with the fixed mounting plate. This steel plate is screwed to the edge of your bench top for mounting the various components of this system. Because the sides of the plate are beveled, BenchMate™ accessories can be easily removed by sliding them upward. The bench pin attachment has a mounting bracket on the back that slides perfectly onto the mounting plate. Like the bench pin with the metal holder mentioned above, the BenchMate™ version one wing nut and a bolt on the bottom to lock in the bench pin for a more sturdy hold.

The BenchMate™ fixed mounting plate is $13.95*. The BenchMate™ bench pin is $23.95*. The mounting plate and bench pin is also available in the BenchMate™ basic and deluxe kits, priced at $178* and $229*, respectively.

*prices may change without notice

25 January 2010

Archives January 2009 : New Item & Review

JFF New Item & Review :
Victoria Lansford’s
Metal Techniques of Bronze Age Masters: Rings DVD


After watching this DVD, I couldn’t get over the amount of content. It is packed full of information, I felt as though I just finished a weekend workshop class with Victoria.

This DVD is definitely geared for the intermediate to advanced jeweler, meaning you must know how to solder. The tips and tricks offered throughout make this DVD helpful not only to make rings, but to work on other projects, including making a hinge, a hollow form, etc..

The video demonstrations offer zoomed in shots of soldering, setting, and other techniques. A few shots are slightly out of focus but are quickly adjusted. Overall the video quality is good.

The DVD is divided into six sections. The first section is on Bezels which covers making your own bezel wire from alloying your own 22K gold and rolling the ingot in the rolling mill. Very cool! In the second section, Victoria guides you through making your own bi-metal using the left over alloyed 22K gold made in the 1st section. The ring shank section, Victoria guides you through the process of making the basic ring shank you will be using in the projects. The three final sections cover the projects that are taught on the Rings DVD; Wax Seal ring, Drusy Ring, and Poison Ring.

The Rings video also gives access to an online PDF booklet with written instructions and photographs. Taking all into account, I give this DVD an A+.

22 January 2010

Archives January 2009 : Jeweler of the Month

Jeweler of the Month :
Jamie Cassavoy

Bio
I got my start in the jewelry making industry when I decided to go back to school and get an MFA in metalsmithing and design. I graduated from RIT School for American Craft in 1996 and from there worked for a couple of years for B.A.Ballou in East Providence, RI. B.A. Ballou is a large manufacturer of precious metal jewelry. There, I worked as a model maker. They were and still are a fixture in the findings and fine finished jewelry business.

In 1998, I moved to Birmingham, Alabama to live closer to my family and start my own jewelry design business, Cassavoy and Company. Today my company is based out of Atlanta.

From the beginning, the goal of my company, Cassavoy & Company, has been to make limited production and one of a kind jewelry made by hand. From sterling silver, 18K gold and precious and semi-precious gems, my staff and I handcraft each piece. My collection is constantly evolving, consisting of about 120 pieces that are all produced in my home studio.

What was your first piece?
A fabulous pair of sterling earrings that were designed using a photo of an antique chair for inspiration.

Who are your jewelry heroes?
Barbara Heinrich, Sydney Lynch, Harold O'Connor, Jacqueline Ryan, Biba Schutz

What is your design inspiration?
Nature - anything botanical really, all of the trees and flowers outside my studio window.

What is your favorite part of making jewelry?
The ability to be creative on a daily basis and to make things that have the potential to make someone feel like a million bucks.

What is on your bench now?
A lot of rubble and parts left over from the holiday rush plus new ideas for the upcoming additions to my line.

What is your most indispensable tool?
That great silicon wheel that Dallas suggested I buy. That and my flex shaft. (The Artifex Wheel)

21 January 2010

Archives January 2009 : Tool of the Month

Tool of the Month :
Torches

For my birthday this year, I got my second torch, an oxy propane set up. Which is shocking if you would have asked me about owning two torches, let alone one torch, a mere 4 years ago. I was afraid of holding something that would have a flame coming out of the end and having a bottle of gas sitting there so close to it! FORGET IT!

As I started taking jewelry classes and working more seriously at JFF, I started to realize that (1) torches are necessary for most jewelry making and (2) torches aren’t scary as long as you are smart and take safety seriously. I did some research, i.e. talked to Hans, Dallas and my teachers, and picked out the torch that worked best for me. My first torch was the Smith Acetylene-Air torch.

Before getting a torch it is important to decide which torch is best for you. As with most tools, we at JFF suggest to not only think about what you are doing today, but think about getting a torch that will be more versatile as your projects evolve.

The Prince Butane Torch is the most basic torch we have at JFF. It is the same torch used in cooking to caramelize sugar, think crème brule. This torch works well for soldering closed small jump rings made of silver and copper. However, this torch is very limiting as it doesn’t produce a large enough flame to do larger pieces, such as rings, bracelets, etc. The Prince Butane torch is $56.50* and sold without fuel. The butane refills are $5.95*.

The Whale Torch is a propane atmospheric (also known as propane-air) torch. An atmospheric torch uses the surrounding air to draw the necessary oxygen to mix with the gas to produce a hot flame. Therefore, a second tank of oxygen is not necessary. The Whale torch uses valves designed to fit either a disposable propane tank or a small refillable propane tank, lowering the cost of the torch. It works well for general purpose soldering and annealing of silver and copper.

The torch comes with three different sized tips for more defined or larger flames. While the Whale torch is a good option for a beginner, the propane-air mixture offers limitations as far as soldering larger pieces and soldering gold are concerned. The Whale torch is $113.25*, including the 3 tips, handle, hose, and valve for either a disposable or refillable propane tank**.

Acetylene-air torches are also atmospheric torches that produce a hotter flame than the propane-air torches. These torches by design can produce a more controlled, smaller flame for more precise work or a larger, bushy flame for larger vessels. The acetylene-air torches come with a regulator that fits on a B-sized Acetylene tank***. There are two popular acetylene air torches available, the Goss or the Smith.

The Goss torch is commonly used in jewelry making classes for its more economical price. It has a single gauge on the regulator, allowing you to know the fullness of the tank. However, the regulator does not have standard hose fittings, so if a second torch is in your future, you would need to purchase an adaptor for the hook up. The bulbous handle of the torch is made of plastic and has four torch tip sizes available. The Goss torch kit comes with a regulator, hose, the most popular sized torch tip, handle, tank key, and striker*** pricing in at $132*.

The Smith torch has a double gauge regulator with standard fittings and a warranty. The double gauge on the regulator allows you not only to know how full the tank is, but to control the pressure of the acetylene. This allows for the ability to have a hotter flame, greater control for fine flame adjustment and consistent fuel pressure. The Smith torch has a slim nickel plated handle with six available torch tips. This torch comes with a regulator, hose, the smallest torch tip, handle, tank key and striker***. The Smith kit is $204*.

Oxygen-Fuel torches are characterized by having two separate cylinders or tanks. One with oxygen and the other with a fuel, like propane or acetylene. These torches have a much hotter, smaller flame because of the combustion reaction from mixing the oxygen with the fuel. The most common fuel used in jewelry making is propane, the flame is hot enough for gold and even platinum**** and burns clean. However, some people choose to use acetylene, natural gas, or MAPP gas. When choosing an oxy fuel torch there are four torches to choose from depending on your soldering needs.

The Meco Midget Torch is built like a tank. The handle and tips are made out of solid brass and uses regular welding hoses. The Midget torch has three tips available. Although this torch lacks the bells and whistles of other oxy-fuel torches, this torch cannot be beat for its durability. The Meco Midget torch is sold with a handle, three tips and hose connectors***** for $170*.

The Hoke torch is least expensive oxy-fuel torch available. The torch body is made in China of cast steel and is nickel plated. The advantage of the Hoke torch is the tip size range. It not only has three standard size tips, but also has an adaptor kit that allows for the use of Micro tips. These tips quickly change in and out allowing for a much smaller precise flame. The Hoke torch is $47.90*, including the three standard tips and the torch handle*****. The adapter kit is $17.95*.
The Smith Little Torch is our best selling torch. This torch has an aluminum body and is light weight. It is the most ergonomic torch on the market. The Little Torch offers seven different sizes of tips and also has a rosebud tip that allows for casting and soldering larger pieces. The Little Torch is sold with hoses and five tips for $119*. JFF also stocks a complete torch set up including the Little Torch kit, two regulators, oxygen tank, propane tank**, and carrier for $495*.

The last torch is the casting torch. This torch has a larger mixing chamber in the handle, producing a larger flame with a higher volume of BTUs. The casting torch is sold in separate pieces, the handle is $98.45* and tips range in price from $30 to $60*.

*prices may change without warning
**The propane tanks are sold empty, JFF does not fill/refill propane.
***Acetylene tanks are sold separately for $135* initially, refills are available for $21*.
****The most popular torch for Platinum work is a Hydrogen Torch.
*****Hoses, regulators, and oxygen and gas cylinders can be purchased separately.

20 January 2010

Archives December 2008 : Question & Answer

Q:
Does everyone who works at JFF make jewelry?
A:
Most everyone at JFF has some sort of background in jewelry.

Hans started out as a hand engraver in Germany. He moved to America to open a jewelry store with his partner, Otto (Which is how JFF began). Hans has a vast background in engraving, plating, and steamers, just to name a few categories! However, he no longer does hand engraving.

Dallas, has worked in jewelry supply stores since he was 14. He has worked extensively in casting, but also in stone setting, gold and platinum. Today, Dallas keeps busy with his four children, but will sometimes play with his tools in his work room.

Christina grew up working at JFF, but never made jewelry until recently. She mostly works in silver and gold.

Mary has worked at JFF for about 20 years, but has yet to catch the jewelry making bug! We are still trying to get her to the dark side :)!

19 January 2010

Archives December 2008 : New Item

JFF New Item :
PEPE Mitre Jig

A mitre jig is an essential tool to any jewelers bench. This jig is endlessly useful for making precise for cutting, bending, scoring, or filing sheet and wire in 90° and 45°angles. Mitre jigs are made of a high quality tool steel so that you can saw and file* directly against the jig and not damage the jig or your file!

In addition to the 90° and 45° angles traditional mitre jigs provide, the PEPE version offers a third angle of 60°. The PEPE mitre jig is made of super hard Russian Military tool steel (hardness 62-65 RC). It measures 1 7/8" x 2 3/4" and has 9 grooves designed to hold a wide range of wire and tubing up to 1/2" thick. The lower opening is is for making 90° bends, cuts and angles; the middle opening for 60° or 120° bends, cuts and angles and the upper opening holds your stock for making 45° or 135° bends, angles and cuts. Supplied with an adjustable stop for making repeat cuttings of the same length and a hex key for fixing the stop. The jig can be mounted in a vise or held in the hand. It is also great for cutting tubing.

Like all of PEPE’s tools, their Mitre Jig offers high quality with a lower price than the Swiss Bergeon or French-made mitre jigs. The PEPE Mitre Jig is $115*.

*prices may change without notice
**Be careful of certain files, as in Grobet Valtitan files and hardware store files. They are as hard or harder than the jig and can mark the vise.

18 January 2010

Archives December 2008 : Jeweler of the Month

Jeweler of the Month :
Kristin Wilder

Bio
Kristin began taking jewelry making classes at Chastain Arts Center in 1995 after being inspired by a co-workers handmade keychain. She studied there for several years before realizing her inner need to further explore the fundamentals and foundations of art and design leading her to venture into a formal art program at Georgia State University. Kristin worked tirelessly to maintain her work in the direction of metalsmithing by incorporating metal techniques into every studio class. While in school she volunteered at The Spruill Center for the Arts as a lab assistant and open studio monitor in order to stay connected to the art medium she loved most.
After graduating Summa Cum Laude at Georgia State University with a Bachelors in Studio Art in 2006 and eager to remain in a creative environment, Kristin worked any job remotely related to her passion. She began her career at Spruill as the Before and After Care provider for their Summer Camp Program and Camp Instructor. She was quickly offered a part-time position as a Registrars Assistant. After a year in the front office at Spruill she decided to focus her time on teaching beginning jewelry classes to adults and teens. Now teaching up to six classes a week ranging in all levels Kristin also serves as the Department Coordinator at Spruill where her focus is program development and educational outreach.

Kristin works on her art and production by translating her own artistic style through unique one of a kind works of art including small sculptures, mixed media images and sterling silver jewelry with semi-precious stones. As a current instructor, Department Coordinator, and a founding member of Fireball Collective Kristin shares her passion for all things creative with her students, friends and co-workers.

What was your first piece?
The first piece of jewelry I ever made was a ring out of a twist tie from a loaf of white bread. I eat wheat now.

Who are your jewelry heroes?
I am constantly inspired and impressed by my students and friends. They are my everyday heroes. I am amazed at what my students are able to accomplish and overcome by simply taking a few hours a week for themselves. They teach me so much and help me to recognize the importance of patience, versatility, and keeping an open mind.
I am very fortunate to have so many talented artists in my life.

What is your design inspiration?
I get inspiration from the natural world around me, myths, folklore, music, and my son.

What is your favorite part of making jewelry?
My favorite part of making jewelry is experimentation and problem solving how a piece will go together.

What is on your bench now?
Earrings that my son is making out of patterned copper discs.

What is your most indispensable tool?
My most indispensable tool is my imagination.

15 January 2010

Archives December 2008 : Tool of the Month

Tool of the Month :
PROXXON Bench Vise

I have about five or six vises. Please note: vises, not vices! There are different sizes and kinds of vises allowing for various tasks. My 4” industrial vise, is great for forging, holding my drawplate, and other heavy duty jobs. I have two small hand vises that provide a stronger grip than pliers for working with small items. I have about 3 small bench vises, these are good for everyday use. Of all of my bench vises, I use my PROXXON bench vise the most. It has a ball and socket joint at the base, providing endless ways to position, rotate, swivel and angle the vise.

For 30 years, Germany-based PROXXON has been supplying high-quality power tools on a smaller scale for precision work. PROXXON tools are priced economically and are recognized by their olive green and yellow color.

The PROXXON vise comes with a removable C-Clamp. With the clamp you can quickly and securely attach the vise to workbenches and tabletops up to 2 5/16" (60 mm) thick. The base of the vise has drilled and tapped holes in order to screw the vise permanently to the workbench. This provides you with the option of either clamping the vise on your workbench as you need it or bolting it permanently with two screws. Personally, I use the c-clamp with my vise because I have limited bench space.

The vise opens to a maximum of 2 3/4” (70 mm) wide. Its steel jaws are 3” (75 mm) wide with horizontal and vertical v-grooves for holding round items. Rubber protective jaw covers slide easily on and off and are included. The jaws also have accessible screws to replace the jaw plates over time.

The downside to this vise, is that the ball and socket joint creates a weak point for forging or any hammering on this vise. However, PROXXON has developed this vise with versatility in mind. The endless positioning angles provides ergonomics. No matter how your bench is set up, you can position the vise to the way it is comfortable for you.

The PROXXON vise is $46.10*.

*prices may change without notice

14 January 2010

Archives November 2008 : New Item

JFF New Item :
Citric Acid Pickle

When I started making jewelry I used Sparex as my pickle solution. However, I found I was sensitive to the fumes and strong odor of the solution. Upon doing research, I found that there are two natural alternatives, white vinegar and citric acid. Since I already had the vinegar, I decided to try it first. While it worked, I found out rather quickly that hot vinegar has a foul odor.

I then decided to give the citric acid a shot. I ordered some citric acid from one of our suppliers to try. It worked great. While it’s not as fast as sparex, it still works quickly and I have yet to notice a smell at all.

Citric Acid is naturally occurring in many fruits and vegetables and is important to the basic metabolic functions of almost all living things. It is used in the food industry as a natural preservative and as an environmentally safe cleaning agent in soaps and laundry detergents. However, citric acid can also be used as a natural alternative to Sparex, PH Down, and other sodium bisulfate solutions.

Citric Acid Pickle comes in a concentrated powder form and should be used in a ratio of 1 part citric acid to 7 parts water. For example 1/2 cups (4 oz) citric acid to 3 1/2 cups (28 oz) water. While a stronger solution of 1:5 or weaker 1:10 works well also. The solution is most effective warm.

Use caution with the citric acid pickle, although it is naturally occurring and safe in foods, contact with dry citric acid or with concentrated solutions can result in skin and eye irritation.
The citric acid pickle is sold by the pound for $4.50*.

*prices may change without notice

13 January 2010

Archives November 2008 : Question & Answer

Q :
What is the difference between soft, half hard, and full hard wire?

A:
All metals have a property called hardness. Hardness is the characteristic of the metal that resists bending. Soft metals are pliable and easy to bend. Hard metals are stiff and hard to bend. The hardness of metals can be changed by heat treating the metal in a process called annealing or by simply bending the wire in a process called work hardening.

Wire, like all metals, will have this same hardness property. Historically, numbers (0, 1, 2, 3, or 4) were used as labels to define the hardness of the wire. The numbers correlated to the number of times that the wire was pulled through the draw plate. The wire becomes harder or stiffer after each time it is drawn through the drawplate. A hardness of 0 meant that the wire was drawn only one time and was as soft and pliable as possible. A hardness of 4 meant that the wire was drawn five or more times and the wire was as stiff and hard as possible.

Currently the designations 0, 1, 2, 3, and 4 no longer correlate to the number of times that the wire was drawn because the hardness of the wire can be changed by heat treating the wire. Practically, most jewelry wire is sold now as either dead soft, half-hard, or hard, with dead soft being wire manufactured with a hardness of 0, half-hard being wire manufactured with a hardness of 2, and fully hardened wire being wire with a hardness of 4.

Dead soft wire can be easily bent and is excellent for making rounded shapes including a spiral. The disadvantage of using soft wire is that the finished piece can be bent out of shape if not properly handled. Soft metal is best when soldering, as the heat from soldering process will anneal the metal and will soften the temper.

Half-hard wire is slightly stiffer than dead soft wire. It is excellent for making tight, angular bends, for making loops in wire, and for wrapping wire around itself. Finished pieces made with half-hard wire are often more permanent than pieces made with soft wire. Half-hard wire is good for handmade ear wires, wire wrapped jewelry and wire sculpture.

Hard wire is very stiff and tends to spring back after being bent. This can make it harder to work with when using a jig. Although the wire components made out of hard wire are difficult to make, they will be very permanent. Hard wire is good for making springs and pins.

As mentioned above, the hardness of the metal can be changed. Many times the various processes of jewelry making will harden or soften the metal. Hardening the metal can be accomplished by bending, hammering, coiling, twisting, tumbling, or by any other manipulations to the metal. This process is called work hardening. Work hardening is an actual physical change to the molecular structure of the metal. The molecules move closer and closer together becoming more and more brittle, eventually breaking the metal.

Heat treating or annealing the metal will soften the temper of the metal and prevent the metal from breaking, ultimately relaxing the molecules. During the annealing process, the metal is uniformly heated to a temperature that is lower than the melting point or soldering temperature. Therefore, soldering will anneal the metal as well.

12 January 2010

Archives November 2008 : Jeweler of the Month

Jeweler of the Month :
Kathy Kinev

Bio
I was born in Minneapolis, Minnesota but my family moved to Atlanta when I was 2. I worked with my hands at an early age, learning needlework and constantly drawing. At the age of 18, I went to Georgia State University to major in painting. As part of my curriculum I had to take a 3-D class. I chose metalworking over pottery. I went downstairs to study under Richard Mafong and I never went back up!!! Once my hands touched metal, I never went back to painting. I got my bachelor’s degree Fine Arts; Jewelry Design and Silversmithing.

While I was getting my BFA, I worked for three different jewelers in the Atlanta area and started Jewel Creations in my closet. I graduated and moved Jewel Creations Inc. to a location in Buckhead. I became a Graduate Gemologist and became a Fellow of the Gemological Association of Great Britain in the late 80's.

I discovered granulation and chain making while at GSU and this interest continued while I became a professional store owner/ jeweler. I had been interested in granulation since I saw a piece of John Paul Miller’s at a GSU exhibit. It was a fabulous spider made of 18K gold with enamel and granulation. I found out about Jean Stark and took classes with her at Wild Acres in North Carolina.

What was your first piece?
I think that the first piece of jewelry I made it a sun face pendant that I chased in class at GSU. I wear it often!

Who are your jewelry Heroes?
My jewelry heroes are Jean Stark, John Paul Miller, Peter Lacovara, Jasper Gaunt, Ancient Egyptians, Greeks and Etruscans. Actually, I have too many to list!

What is your design inspiration?
My design inspiration comes from the natural world, ancient motifs and I like to design clean, elegant jewelry with an emphasis on craftsmanship. Sometimes these designs come to me in my dreams. I have around 1000 books and a small selection of them is about granulation and ancient metalsmithing. I refer to these often! I also love to travel to Europe and study jewelry of other cultures.

What is your favorite part of making jewelry?
I love all parts of making jewelry! Working in metal involves working with earth, air, fire, and water. The experience is very elemental and basic. The tools are also very elemental and basic- almost the same as what was accomplished with 2000 years ago.
What is on your bench now?
I have four granulated birds to finish, three waxes to carve, a platinum chain that needs to be finished and a silver pendant that also needs to be finished.

What is your most indispensable tool?
My hands.

11 January 2010

Archives November 2008 : Tool of the Month

Tool of the Month :
3M Radial Bristle Discs

The first piece I ever made was an intricate pierced rose pendant. The design had tiny crevices and holes that I just could not clean up. I tried so many different techniques from bristle brushes with compounds to tiny escapement files to thrumming with string charged with Tripoli and rouge. But all I was getting was a mess! So, I gave up.

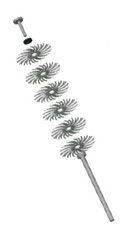
About one year later, we got this little colorful, flower-like wheels from 3M. The tiny little fingers were conformable and flexible. They could reach into tiny intricate areas to sand and polish without using a compound. I decided to try them out, I mean what could it hurt? I was shocked, not only did they clean up my pendants, but the different grits provided a great uniform finish.

The 3M Radial Bristle Discs have highly flexible bristles that can easily get into small grooves and areas with fine detail. The fine fingers accommodate the shape of whatever they are brushing against, so they even work well on curved or flat surfaces. The radial bristle discs are cool running and long lasting. They can be used on most metals.

To use, stack the individual discs on a miniature screw top mandrel, you can use one disc or as many as you can fit on the mandrel to increase the surface area to be polished. They work best when you stack between three to six discs at a time. The discs must be mounted so they rotate as shown in the picture to the right.

The wheels have the abrasive compound embedded into the bristles, so there is no need to add polishing compound. Each disc is color coded to denote the seven grits that are available. The grits range from a coarse, 80 grit to a high polish, 1 micron.

JFF carries the 3/4" diameter wheels in packs of 1 dozen. Other sizes and grits are available by special order only.

I now use the 3M radial wheels on just about every project. From solder seams with tight angles to flat surfaces, the radial wheels leave a consistent uniform finish on high and low areas. I have found stacking three to six discs works best and I prefer using the coarser grits (yellow, white, red and blue). Don't get me wrong, the finer wheels work great also!

08 January 2010

Archives October 2008 : Questions & Answers

Q :
What do the sizes of the sawblades signify? How do I know what size blade I need?

A :
Saw blades are sized by the teeth per inch, the more teeth per inch, the finer the blade. Furthermore, standard saw blades are codified in a simple numbering system, the lower the number, the finer the blade and the more teeth per inch. For example, a #5 is finer than a #7.

The numbering for jeweler's saw blades is based off of the standard code; however, they are so fine compared to other types of saw blades, the numbering continues by counting the number of zeros. The finer the blade, the more zeros. The sizes from fine to coarse are as follows : 8/0, 7/0, 6/0, 5/0, 4/0, 3/0, 2/0, 0, 1, 2, 3, 4, 5, 6, 7, and 8. The fraction blade sizes, such as 3/0 are spoken "three oh," three zero," or "three ought."

Because the jewelers saw blades are so fine, they tend to break rather easily. While correct sawing form is very important, choosing the appropriate size blade for the job will help reduce the number of broken blades. Ideally, you should choose a blade that has 2 1/2 teeth per the thickness of the metal you plan to cut. Since it is very difficult to measure the teeth against the edge of sheet metal or wire, many charts are made to help, like the one below. Keep in mind the chart lists the largest blade for the gauge of metal, if you are sawing an intricate design you may want to use a finer blade.

07 January 2010

Archives October 2008 : Jeweler of the Month

Jeweler of the Month :
Julia Woodman

Bio
Julia grew up on a North Carolina Farm, where she was introduced to art at an early age, including, drawing, knitting, crocheting, embroidery, and ceramics. Julia went onto Fashion School in New York, where she studied fashion pattern making and sewing. Following her marriage, Julia moved around the world with her army officer husband, Dick, and her two children. To keep herself busy, Julia became accomplished in needle point and in 1968 was commissioned to produce the dining chair seat covers for the North Carolina governor's mansion.

Upon Dick's retirement, they moved to Atlanta, GA. Julia enrolled in the School of Art and Design at Georgia State University. Taking only a few credit hours a quarter, nearly twelve years later, Julia received her BFA and MFA in metalsmithing under the tutelage of Richard Mafong. During this time, Julia also took metalsmithing workshops at the Penland School of Crafts from many masters, including Heikki Seppa. While at GSU, she won first place in the Presidential medallion Design competition in 1990 and won first place in the National Student Sterling Design competition twice. Following her schooling in Atlanta, Julia won a Fulbright Scholarship to spend a year studying in Finland at the Lahti Polytechnic Design Institute, Upper Goldsmith School, where she became the first American to be certified a Finnish master silversmith.

Today, Julia teaches at Spruill Center for the Arts, Chastain Arts Center and specialized workshops at Penland School of Crafts and Florida Society of Goldsmiths. She has won several national awards and her work is in private collections throughout the US and in the permanent collection of the Victoria & Albert Museum, London, England and the High Museum of Art, Atlanta, Georgia.

What was your first piece?
My very first piece was a cuff bracelet, made of 6 bread & butter knives and one gravy ladle. (pictured to the right)

Who are your jewelry heroes?
Heikki Seppa and Camillia Okim

What is your design inspiration?
I use nature primarily and many times I take pictures of old masters, maybe early 20th century, turn them upside down and draw the negative spaces. I then manipulate them using tracing paper.

What is your favorite part of making jewelry?
My favorite part of the execution of my pieces is the design, then figuring out how to put the thing together.

What is on your bench now?
On my bench now are hooks I've designed for an enormous necklace for Barbara Becker Simon to hang up on her studio wall. (she'll be happy to know I'm working on it)

What is your most indispensible tool?
My favorite tool is a no brainer, its my 50 ton hydraulic press. I need all the help I can get.